Twilight Fairy


My entries for the #BringYourTastiestBowl Challenge

I know a lot of people with a sweet tooth who always keep struggling for a balance between their palate and their calorie count. And, when it comes to festivals, no one can stop at just one! Diwali, Holi, Christmas, even Navratras have become a reason to gorge at sweetmeats .. So when I read about Quaker’s #BringYourTastiestBowl challenge  I wondered if I could try my hand at not only experimenting at healthier versions of sweets served during festivals, but also may be win 50 lakhs .. 🙂 The contest is being judged by the ever popular Chef Vikas Khanna as well as people who vote for their favourite recipes.

As we know, Oats are a gluten free, rich source of fibre, which give energy to keep you going for a long time. Hence it is healthier to make Oats based versions of popular “unhealthy” dishes 🙂

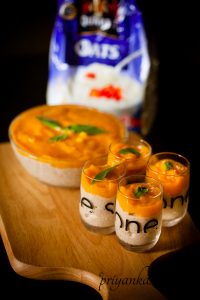
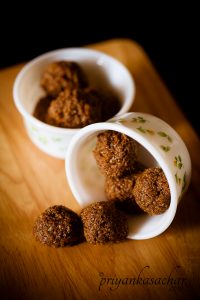
So here are my versions of 2 very popular sweets – Mango Basil Oats phirni (diwali) and Oats Til laddoo (Lohri) for the “Bring your tastiest bowl challenge”

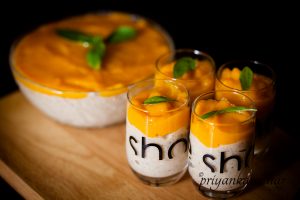
Mango Basil Oats Phirni

Phirni is a classic Indian rice pudding, similar to kheer, that is mostly consumed in north India on festive occasions like Diwali, Karwa Chauth etc. The dish is also consumed during Ramzan and prepared for the feasts at Muslim weddings and festivals like Id, among the Muslim communities of India, Bangladesh, Pakistan, and Afghanistan. 

Here I am preparing my version of Phirni with Oats instead of rice. And I have given it a further twist by adding mango and Basil flavours to it. Without further ado, here’s the recipe.

Mango Basil Oats Phirni

Portion size : 1

Serves : 3-4

Cooking time : 30 minutes

Preparation time : 5 minutes

INGREDIENTS

  • 1 litre Full cream milk
  • 1 cup oats
  • 2 Tbsp sugar or as required
  • 18-20 almonds/badam, blanched, reserve a few for garnishing
  • 6-7 cardamoms/hari elachi (crushed and powdered in a mortar-pestle)
  • 2 Mangoes for mango puree
  • Few leaves of Basil for garnishing

MeThod:

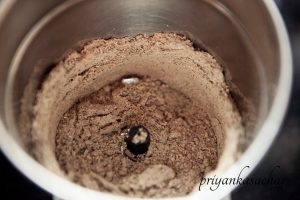
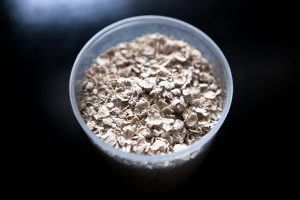
1. Grind the Oats in a dry grinder till it is fully powdered. Keep aside 
      quaker-1 quaker-4

2. Heat milk in a thick bottomed broad pan or sauce pan or kadai, let the milk come to a boil. Then lower the flame.

3. Add the powdered oats, stir and add sugar also.

4. On a low to medium flame cook the mixture without covering. Keep stirring at regular intevals.

5. Powder the cardamoms in a mortar-pestle. Discard the almond peels from blanched almonds.

6. When the oats are cooked and milk seems to be half the original quantity, add the almonds & cardamom powder.

7. Stir and cook for further till the phirni thickens.

8. Take out the pulp of 2 mangoes and puree in a mixer.

9. Pour the phirni in serving bowls. Pour a layer of mango puree on top and refrigerate the Phirni.

10. Once cooled, garnish the phirni with basil leaves & serve.
quaker-8 quaker-11


Gluten Free, Vegan Oats Til Laddoo

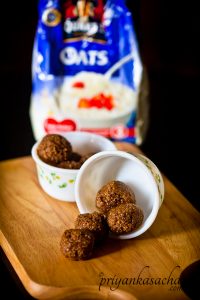
Til or sesame laddoos are typically consumed on Lohri. These laddoos typically also have khoya or condensed milk. My version of Til laddoos is made with Oats & Gud (Jaggery). There is no need to add any ghee or oil because the sesame seeds exude enough oil for binding. The absence of white sugar makes this dish even healthier. And since there are no milk products in this, not only is it Vegan, it is also Gluten free because of Oats. So here’s the recipe.

Gluten Free, Vegan Oats Til Laddoo

Portion size : 1

Serves : 10

Cooking time : 5 minutes

Preparation time : 15 minutes

INGREDIENTS

  • 1 cup oats
  • 1 cup sesame
  • 1 cup grated Gud (jaggery)
  • 3-4 cardamoms/hari elachi (crushed and powdered in a mortar-pestle)

MeThod:

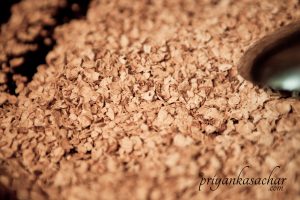
  1. On medium heat dry roast oat.

quaker-2

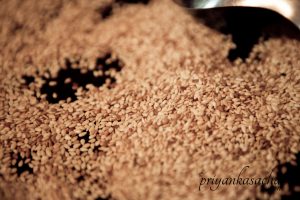
2. Similarly dry roast sesame seeds separately until golden.
quaker-3

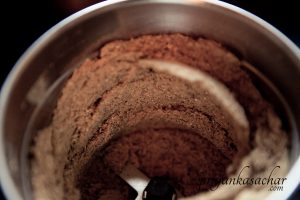
3. Cool them. Powder oats and sesame seeds in a mixer.


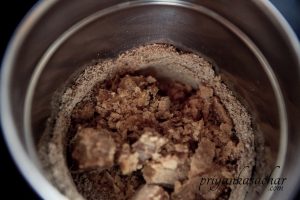
4. Add the jaggery & Cardamoms and again powder further.
quaker-5 quaker-6


5. Roll into balls while the mixture is fresh.
quaker-10quaker-7

6. Store in an air tight jar.


Do try out the recipes and let me know if they tickled your tastebuds enough. Who knows you may even stand a chance to win INR 50 lakhs by participating with a unique entry!


Dal Makhni Lentil burger with Chicken Curry Mayo


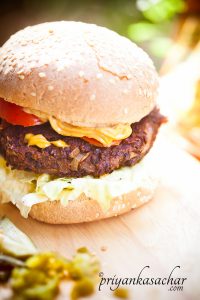
I have been following Masterchef Australia since quite a while now. So when Knorr India came up with a contest that gave a chance to meet the judges, and attend a #knorrmasterclass, I went all in! The pre-requisite was to use any new Knorr Easy chef Indian masalas in a dish. So I promptly ordered mine from Bigbasket as instructed. What I came up with is a Dal Makhni Lentil Burger (using dal makhni masala) with Chicken Curry Mayo (using chicken curry masala). I’ll go straight to the recipe.


Dal Makhni Lentil Burger with chicken curry mayo

Portion size : 1

Serves : 1

Cooking time : 30 minutes

Preparation time : 7 hours

Utensils/Equipment – 1 pressure cooker to cook the Black Urad dal, 1 pan for making the lentil patty, knife for chopping, 1 cutting board, 1 utensil to soak dal overnight, 1 pan for making the lentil mix, 1 mixer for bread crumbs

INGREDIENTS

Black Urad dal – ½ cup
Onion – 1, finely chopped
Knorr Dal Makhni masala
Knorr Chicken curry masala
Butter – roughly 2 tbsp & some for frying
Mayonnaise – 4 tbsp
Salt – to taste
Bread – 1 slice
Jalapenos, Red paprika, pickled Gherkins, iceberg lettuce, tomato – for garnish

MeThod:

1. Soak Black Urad dal overnight. Next morning pressure cook it till the grains are soft (roughly half hour for patty, 1 hr if you want actual dal)

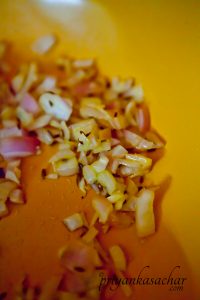
2. In a pan fry some onions in butter. If you use the masala you dont need to add anything else, but I added a little onion for texture in the patty.

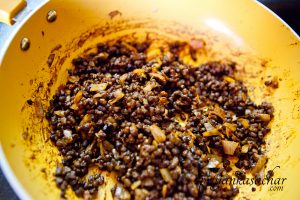
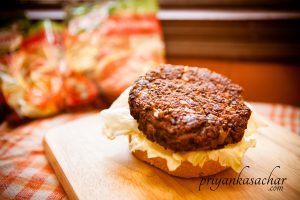
DalMakhniLentilBurger-1 3. Add the dal, half packet of Knorr Dal Makhni masala & just 2 spoons of water to mix it all well. Sprinkle some salt, but this masala already has salt, so be careful about how much you add. Let it cool and mash it completely.
DalMakhniLentilBurger-2

4. Pulse one slice of bread in a mixer and add these bread crumbs to the lentil mash for increasing binding.

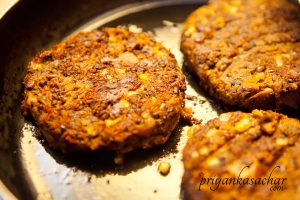
5. After the mix is mashed, shape into patties and fry in some butter for added makhni flavour.

DalMakhniLentilBurger-3

6. Now prepare chicken curry mayo, by taking the mayonnaise in a bowl and adding a few pinches of the chicken curry masala. Mix very well so that the masala is completely absorbed well into the mayonnaise & u dont taste it as separate granules.

7. Heat the burger bun. Take the lower part, spread some of the chicken curry mayo, place some iceberg lettuce on to it and a dal makhni patty.

DalMakhniLentilBurger-4

8. Garnish with red paprika, chopped jalapenos, slivers of pickled gherkin & slices of tomato. You can add more mayo if desired. Voila! Enjoy!

DalMakhniLentilBurger-13

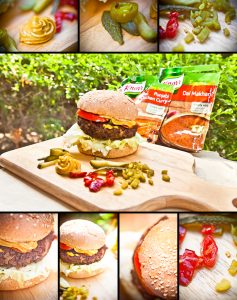
Here’s a composite image of all the elements of this dish.

DalMakhniLentilBurgerWithElements

I must say it was quite tasty ESPECIALLY the chicken curry mayo. Dal makhni flavours anyway go so well with butter chicken & chicken curry. So go ahead try this protein packed very filling Dal Makhni Lentil Burger with Chicken Curry mayo and let me know how it turned out!


Want to time travel? Visit Haveli Dharampura

If you have ever read Enid Blyton’s “The Faraway tree” series, you would remember how a different land used to come on top of the tree every time the trio of lead characters visited the tree top..and they would have fun, be mesmerised with the magic and then come back to their own land. How cool would it be if you knew some place where if you open the door you enter a different world, you partake, you enjoy and then you go back to your own world. Well now there IS one such place. Let me introduce you to Haveli dharampura.

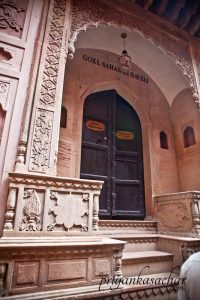
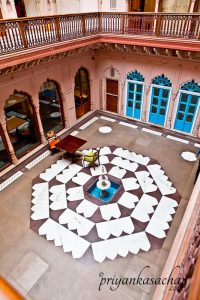
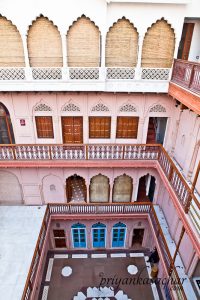
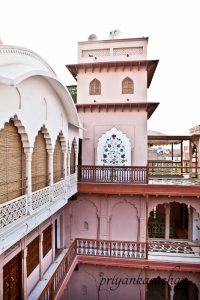
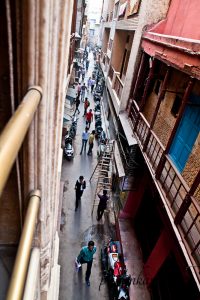
Set in the bylanes of chandni chowk, ensconced in gali guliyan, where the lanes are so narrow, you can only walk – lies an old world land. As you enter the haveli’s heavy set doors you step into a different world. The world of squalor, grime and zillion electric cables tied in to precarious knots is left behind on the outside. What you face is a glimpse of the way nobles and courtiers used to live in Delhi, not so long back. The architecture is a pleasing and unique mix of Hindu, Mughal and colonial influences. You first encounter a verandah with a fountain in the centre, as is typical of many Indian havelis.. a central courtyard with a garden or fountain which used to cool the entire house built around it. The three storeyed haveli can be seen fully from here and well.. from all floors as well. Beyond the varandah is the Baithak or drawing room which now hosts the restaurant – Lakhori. Named after the bricks that the haveli is built with, it serves a cuisine with Mughal and Jain influences.. The same which evolved into the Chandni chowk food that everyone rushes to grab a bite of every now and then.

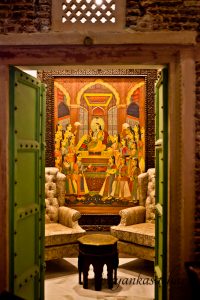
The entrance to Goel Sahab ki Haveli! The Verandah with the fountainA picture of the dilapidated look the Haveli bore before resurrection A seating room next to the restaurant

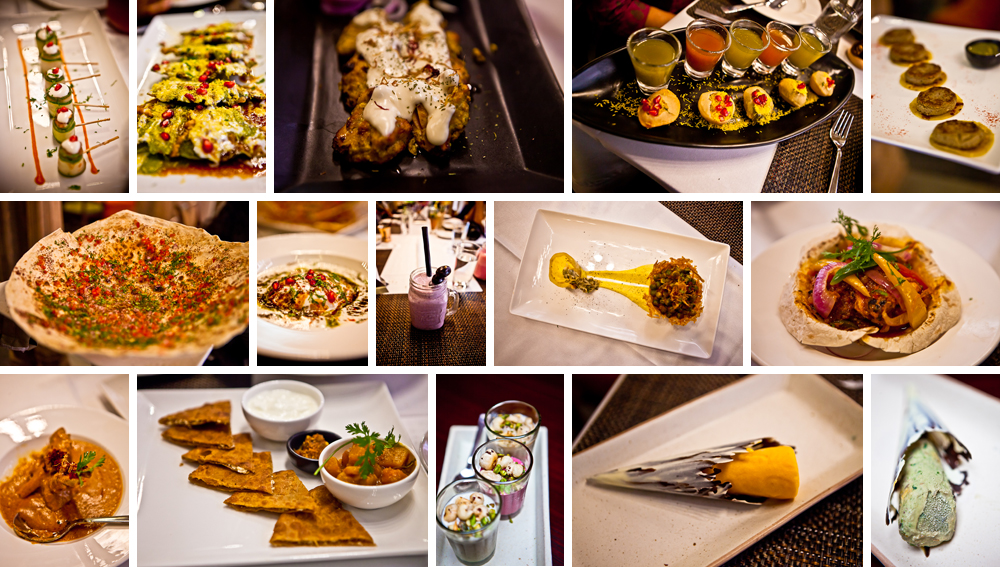
The day I visited this old world gem, I met Vidyun Goel the hostess and was treated to a sumptuous collection of dishes from an elaborate menu. Here are some of them. In ascending order of appearance these are – cucumber chaat canapes, palak patta chaat, murg ke paarche, golgappe, galouti kabab, kadak roomali masala, dahi bhalla, Berry’s delight, aloo gobhi mattar deconstructed, kadai chicken (served in a roti), mutton korma, paneer parantha with kashiphal kee sabji, makhane kee kheer, mango kulfi and paan kulfi both wrapped in a chocolate shell .. There was so much more to nibble at that somewhere I quite forgot to take pics and just immersed myself in the gastronomic experience.

Food at Lakhori


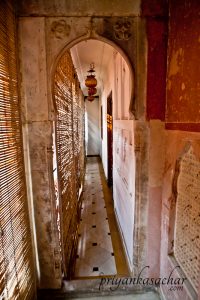
The three storeys of the haveli above the ground floor, have 13 fully furnished rooms – the 14th was converted into a spa. These rooms are divided into Jharokha Rooms, Diwan E Khas Rooms, and Shahjahan Suites. If I am not wrong they are named after various gates of Delhi – the old city. The rooms have the vintage old world feel but are fully equipped with all modern amenities and most importantly, well, modern bathrooms :). As dear readers may note, one may live in this land for a while before retreating to one’s own world. But it wasn’t always like that. Built around 1887 AD, the haveli rooms were divided and subdivided by their owners into nearly 64 rooms! The restoration that took about 8 years, 45 lakhs, 50 specialised masons and labourers was a slow and painful journey with no precedent. Finally we see it restored to its old world glory and the ambience quickly takes us back to an era we haven’t actually ever seen. The credit of all this goes to heritage lover & MP Mr. Vijay Goel, his son Siddhant Goel & their entire family. I hope that other havelis in that area follow suit and somehow manage to do the same because the government is also offering them restoration assistance funds.

Glimpse of the rooms

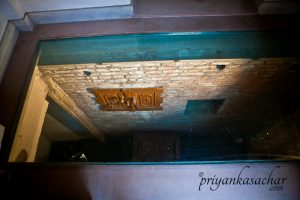
Apparently the previous owners had a dream that there was a safe in the basement under the ground.. they dug up that precise spot and lo and behold! There indeed WAS a safe under the ground! They claim that it was empty but then who knows what *really* happened when this tijori was opened 🙂 . I wish my dreams told me about buried treasures!

Underground Tijori!

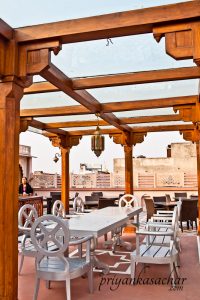
Here’s a look at the views from the top floor .. you can see all the floors from every floor. Makes me miss the old world architecture where you could see all the family members and talk across floors. You can also see Jama masjid from the terrace. There’s another rooftop restaurant at the terrace called the “baradari”. The terrace has a new piece of architecture built into it borrowed from the Rajasthan havelis. The panorama shows the view from the absolute top with Vidyun also in the picture.

View of all the floors from the top floor Jama Masjid viewed from the haveli  The rooftop restaurant Some rajasthani architecture

View from the roof of the haveli & Vidyun in the panorama


Apart from being a heritage hotel the Dharampura haveli also has a lot of exciting things for its guests. It houses a tiny art gallery with images from the olden times of Chandni chowk. It will perhaps showcase exhibitions of modern artists too. Apart from this they also have a tiny library section with a cosy seating area next to it. They have a shisha room as well and of course there’s the spa. And did I mention that they also have an elevator? It sure is much needed.

Art Gallery & library seating


The magic of the old world would not be complete without the kathak performances that have been started now. They are organised every Friday, Saturday, Sunday along with a fixed dinner menu. Unfortunately I haven’t witnessed any, but can only imagine how breathtaking it would look. There are other activities for the guests, like Kabootar baazi (pigeon flying) and patangbaazi (Kite flying).

Pigeon flying - a popular sport in chandni chowk

A view of the balcony at the haveli and the narrow lane and a different world it looks upon.

Balcony at the haveli Narrow lane and a different world outside

 Here’s a glimpse of the “Now an Then” provided by the folks at Haveli Dharampura

Now and then - provided by Haveli Dharampura

Now and then – provided by Haveli Dharampura

There are just a handful of heritage hotels in Delhi but all of them are from the colonial era from what I know. Haveli Dharampura has, by far the oldest heritage in Delhi! Being in the heart of THE delhi, it has a unique advantage for travellers, who want to explore Delhi and don’t want to be located very far from the centre of attraction. These walls have seen lot of centuries, exchanged hands with a lot of owners and under all that plaster and paint lies the soul of a haveli that lives on and has been witness to many stories. You must go and have a conversation with it some evening.


Contact info:

2293, Gali Guliyan, Dharampura, Delhi-6

Tel.: 011-23261000, 011-23263000

E-mail: info@havelidharampura.com
reservations@havelidharampura.com


Oats Poha


It was with a lot of surprise that I reacted when I learnt from a friend, that there’s one brand of Oats available in India that has customised the oats to substitute various Indian staples. So when Bagrry’s India contacted me to try out some of their products, I agreed pronto. They have Oat substitutes for Atta, poha, sooji, and rice among other things like regular oats. AFAIK there’s no other Oats brand that provides “customised for India” variants. I have tried some of their products and quite liked them.

I am sharing a recipe that I tried some time back. I made the Oats Poha using the “Oats for Poha” variant of Bagrry’s


Oats Poha with bagrry’s “oats for poha”

Portion size : 2

Serves : 1

Cooking time : 20 minutes

Preparation time : 10 minutes

Utensils/Equipment – 1 large pot or saucepan for boiling peas & beans, 1 pan for making poha, knife for chopping, colander to drain veggies and Poha, 1 cutting board, 1 bowl to soak oats, 1 pan for roasting peanuts

INGREDIENTS

Bagrry’s Oats for Poha – ½ cup
Plain poha – ½ cup
Onion – 1, finely chopped
Peas – ¼ cup
French beans – ¼ cup diced
Peanuts – ¼ cup
Dry Red chillies – 2-3
Curry leaves (green) – few
Mustard seeds/Rye – few
Lemon juice – 2 tbsp
Oil – 2 tbsp
Salt – to taste
Turmeric – a pinch
Chilli powder – to taste
Coriander powder – ¼ tsp

MeThod:

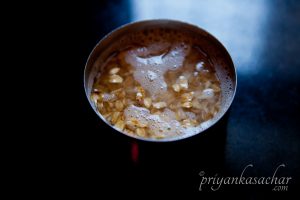
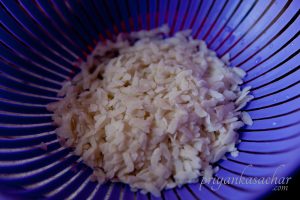
1. Soak Bagrry’s Oats for Poha in a bowl. The original recipe says 3-4 minutes, but I soaked them for 10 minutes. Drain water and keep aside

Soaked Oats

2. Wash normal poha, drain it and keep aside

Soaked Poha

3. In a pan add oil and heat it on a high flame for 2 minutes. Now add mustard seeds, dry red chillis, curry leaves. Let the mustard splutter a little bit.

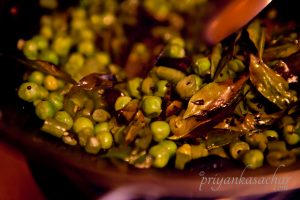
4. Add onions and saute. Meanwhile boil peas and french beans till they are somewhat cooked but not fully cooked

5. After a while, drain the peas and french beans and add to the pan. Stir continuously. Simmer down the flame and cover with a lid till the vegetables are cooked.

6. Now add Oats for Poha and all the spices. Mix well.

7. Now add plain poha and mix well so that all the spices evenly coat the poha

8. Cook on medium flame for 5-10 minutes. Meanwhile roast the peanuts on a tawa for 4-5 minutes and then let them cool.

9. Once cooked, add the lemon juice to the poha, sprinkle some peanuts and serve

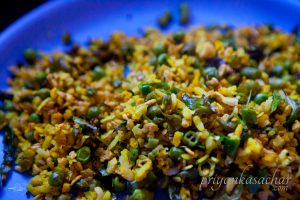
Oats Poha is ready!

Here’s the recipe in recipe card format.

I must say it was quite tasty unlike what I really expected. It was very filling as well. I felt less guilty because of replacing at least some part of my white grain consumption with oats. 🙂 Go ahead and try the recipe and let me know how yours turned out!


Inside Out Genovese Pasta At The Beach 2

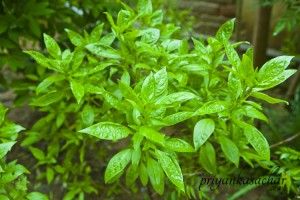
I love Basil. Which is why I have untamed Basil bushes growing in my lawn. It’s a cousin of our very own Holy Basil (Tulsi) but tastes very different. Apart from garnishing anything with basil, the best thing to make with it is Basil pesto.

Pesto is a sauce originating in Genoa in northern Italy and traditionally consists of crushed garlic, basil, pine nuts blended with olive oil, and Parmesan cheese. There are many variations to this. You can add a dash of other herbs that go with basil or replace pine nuts with walnuts or even almonds. You can also make it without any nuts and it’ll taste really good even then. The word pesto comes from the past participle of the Genoese word pestâ  which means to pound, to crush, in reference to the original method of preparation, with marble mortar and wooden pestle. Anyway, enough with the history behind it. Pesto tastes wonderful and is typically used in Italian pasta recipes. A very classic Italian recipe is Genovese pasta, that originated in Genoa, where potatoes and long French beans are added to pasta and then tossed with generous amounts of basil pesto. It’s very quick and easy to make and is made with veggies like potatoes and beans which are staple to all households! I’ve made it earlier as well, as shown in the instagram image below.


Today’s main course: genovese pasta- spaghetti with basil almond pesto, long green beans & cubed potatoes ?#moi

A photo posted by Twilight Fairy (@twilightfairy) on


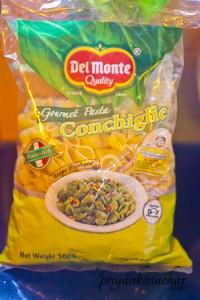
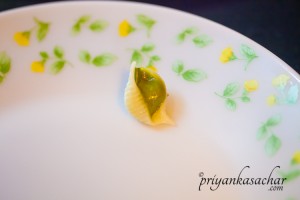
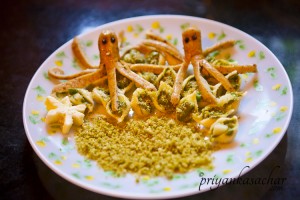
So on this fine sunday I decided to give the Classic Genovese pasta – a twist. Instead of the pesto and the veggies being on the outside of the pasta, I decided to put them INSIDE the pasta. Hence the Inside Out Genovese Pasta. (The twist to this recipe doesn’t end just there). I figured that the best shape for this dish, which is easily available in India would be Conchiglie (Sea shell shape). So off I went to the local gourmet store and bought myself a pack of Del monte’s conchiglie pasta. It’s a good pasta for stuffing things as well as eating like regular pasta. It also coats well and holds shape. And since creating food is akin to creating art, I decided to play out a seaside scene with my food, sitting far away from any beach and sans any seafood. Hence came into existence – the ‘Inside Out Genovese Pasta At The Beach’.

DelMonte Conchiglie

 So here are the detailed steps.

MeThod:

1. In a large pot or saucepan, put water to boil. Add some salt. Put the Conchiglie shells in it and cook al dente or as per what you like (I like them properly cooked). Drain them , Pour a dash of extra virgin olive oil on them and keep aside. Ideally the pasta and the potatoes and the beans can all be cooked together in one pan but in this version of the Genovese pasta, since we’ll be stuffing the shells, it is important to cook the pasta and the veggies separately.

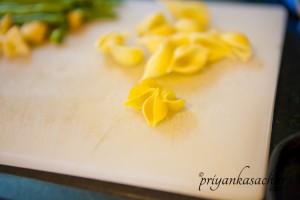
DelMonte Conchiglie pasta in raw and cooked form

 This image shows the uncooked pasta with the cooked pasta in the background to give an idea about the relative size.


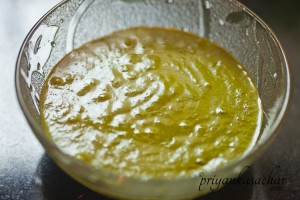
2. For Basil pesto, in a blender blend the nuts with the garlic and parmesan. Then add the basil, dash of balsamic vinegar, extra virgin olive oil (as per your health concerns) & churn into a sauce. Season with salt and a little pepper. Put aside. Even if you make extra you can use it later, as a dip or just as a spread in a sandwich.

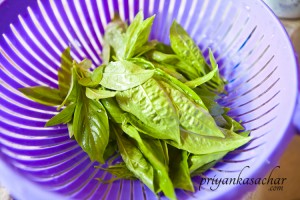
Basil in my lawnA cup full of packed basilBasil pesto


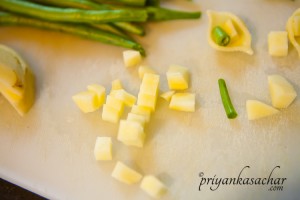
3. Peel the potatoes, and then dice into very small half inch cubes. The size should fit into a piece of pasta.

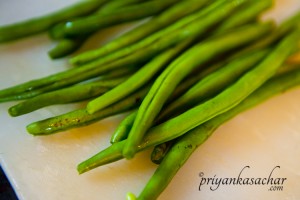
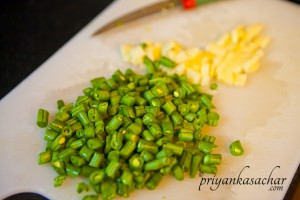
Take the trimmed beans and similarly, chop them into half inch pieces. Classically in a Genovese pasta , the beans are barely halved in size and sometimes not even halved. Readers can try that version as well. It would just mean not stuffing the shells.

Trimmed beansDiced potatoes that fit into the pastaChopped beans and potatoes

 4. Again take some water in the earlier pot or saucepan, add some salt and put to boil. Put the potatoes first, since they’ll take longer to cook and we want crunchy beans. After 5 minutes, add the chopped beans. Cook for 2–3 minutes until the beans are cooked but are still crunchy. The potatoes should be cooked thoroughly.  Since they have been diced into small cubes, it will not take that long. Drain both veggies in a colander.

5. Take a pan, heat up some olive oil in it and add a generous pinch of thyme. To this now add the potatoes and the beans. Toss quickly and add some salt and pepper. Keep in mind that there is already salt in the pesto as well as the Conchiglie pasta. Keep the mixture aside.

6. In a pan, heat up 1 or 2 hot dogs or frankfurters or sausages. Whatever is available and as per your appetite.  I used chicken pepper sausages in this example.


For the elaborate plating for the ‘scene at the beach’:

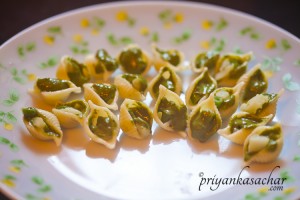
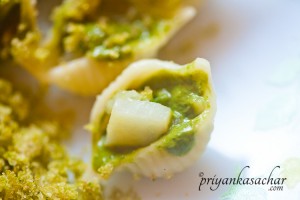
7. Take a dish in which you wish to do the plating. Take one shell at a time and put a piece of bean and a cube of potato or just few pieces of one vegetable as per your choice. There’s no set formula, and it can be a random mix as well. After this you have to put the basil pesto inside the shells. You can either use a small spoon or use a piping bag or icing gun if you are more comfortable with that. I used a small spoon. You can also choose to put the pesto first and veggies later. It can be an interesting mix of stuffed shells. These will, as is apparent, be the sea shells in your beach scene. You can stuff as many shells as you want. The quantity in the image below is only for representation of the beach scene.


Stuff each shell with pesto, potatoes and beansA plate full of stuffed shells

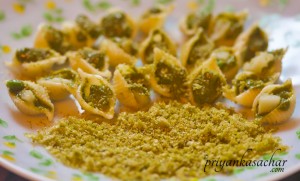
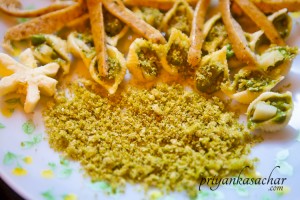
8. After you have taken several shells (as per your appetite) and stuffed them, and aligned them on a plate, take a slice of bread and spread some basil pesto on one side. Toast in a toaster or bake this bread till it is brown and crisped completely. I used the air fryer here for the same result. Once this is done, break the crisped toast into pieces and crush into powder in a blender. This will be the (flavoured) sand at the beach. Pour the sand in one corner of your seaside scene.
Seaside sand created with toasted bread

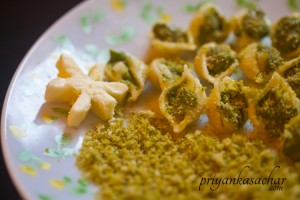
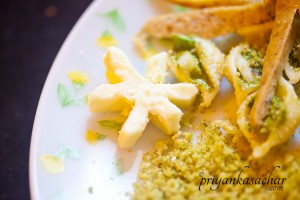
9. Take the cheese block and a cookie cutter in a star shape and cut out a star piece. After this you can try your artistic skills and slice off more cheese to make this star look more like a starfish with slender tentacles. You can place this starfish anywhere in the seaside scene.

A starfish cut out of cheese

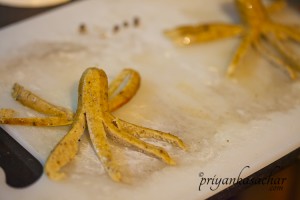
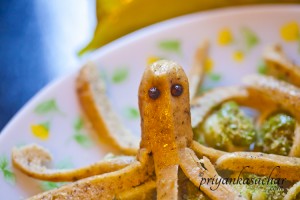
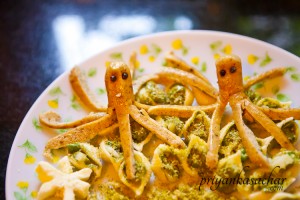
10. Take the cooked sausages (or hot dogs) and after leaving 1 – 1.5 inches on the top, slit the rest into 2. Then slit into 2 more. Then slit the individual 4 pieces into 2 each. The resultant 8 pieces will be the legs of the octopus. Stick 2 peppercorns into the top portion of each sausage to make eyes. You might have to poke a tiny hole with a knife if they don’t stick in. Your octopuses are ready!

Place the octopuses anywhere on the seaside scene we have going.

Slicing a sausage for making an octopus Octopuses made out of chicken sausages

11. For the final touch, You can also sprinkle some of the pesto toast sand onto the shells. Your sea beach scene is complete! If you wish, you can splash a little extra virgin olive oil in this dish too.

The final dish with the beach scene complete with sea shells, sand, octopus and star fish!

Instead of serving bread on the side as is typical with pasta dishes, I’ve used the bread as sand. Instead of adding chicken to the dish while cooking, I’ve used chicken sausages for octopus. You can also omit the sausages if you are a vegetarian. All in all, this is a healthy wholesome meal made with commonly available ingredients.

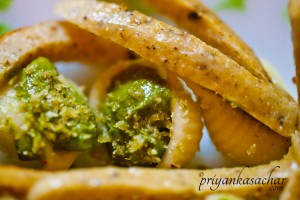
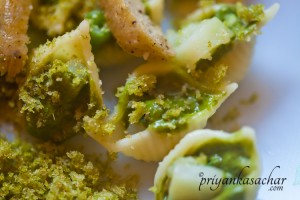
Here are some closeups of individual elements of this dish.

DelMonte-21 DelMonte-22


DelMonte-25DelMonte-23


DelMonte-24DelMonte-20


Voila! Enjoy the Inside Out Genovese Pasta

 Tip:

1. You can also leave the plating portion of this recipe and just toss the pasta together with the potatoes and beans and basil pesto.

2. For a variation, you can also add a dash of vodka into the pesto instead of balsamic vinegar.

3. Leftover pesto sauce can be stored in a jar. Add some extra virgin olive oil on the top to avoid oxidation.

4. Leftover pasta can be put in muffin cups, layered with grated cheese on top & baked. A quick to-go handy bite is ready!