Yearly Archives: 2016


Fight demonetisation woes with AxisPay UPI app

These days everyone is going through a tough time receiving money or sending money, thanks to the Vaahiyaat demonetisation rules imposed on us. Why vaahiyaat, is stuff for another post. However, till the time the instant removal of 86% of our cash flow is dealt with slowly and painfully, we can surely ease the pains we go through every day to pay for various services and goods.

Going Cashless can be done in many ways. Apart from paying through credit or debit cards and mobile wallets, one such option is UPI apps. UPI stands for Unified Payments Interface , a system that powers multiple bank accounts into a single mobile application (of any participating bank), merging several banking features, seamless fund transfers & merchant payments – all into one. This system was launched by NPCI (National payments corporation of India) in April’16. Now all banks have started sharing their particular UPI enabled apps from August’16 onwards.

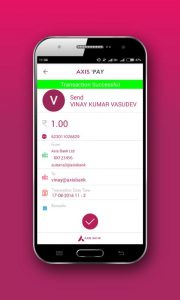
In this post, I will share some details about the Axis Bank UPI app, called AxisPay that I had the pleasure of using and experiencing lately. Axis bank was one of the earlier banks to come out with their app. It is very simple to use. Instant payments can be made vis this app, by using a Virtual Payment Address (VPA). One does not need to remember beneficiary details like account number, IFSC etc. Just Send money or Ask for money using a Virtual Payment Address. 

Here’s a very quick 20 second intro of what all Axis Bank’s Axis pay UPI app can do

And here’s how to do it.


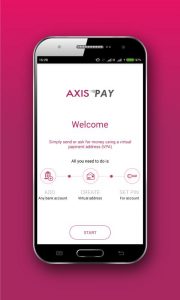
As you can make out, the steps are really simple. No matter which bank account you have, using this app, you can send payments directly to any other bank account holder as long as they are using any UPI app (similar to withdrawing cash from any ATM irrespective of bank account). So here are the steps.

  1. Download the Axis Pay app from Google Play Store (iOS version coming out soon)
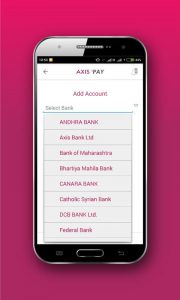
  2. Select your preferred bank account
  3. Create a unique ID (example – yourname@axisbank)
  4. Verify your account & set a PIN
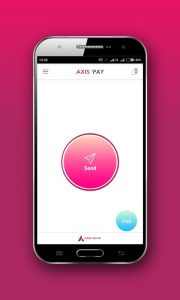
 

To send money:

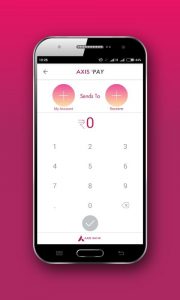
  • Select your & receiver’s unique ID
  • Enter amount
  • Send money by entering PIN

To receive money:

  • Select your & sender’s unique ID
  • Enter amount
  • Receive money when sender approves transaction on his app

The best thing about making payments through the Axis Pay UPI app is that the money doesn’t go to a wallet with an additional step (and some charges) to transfer it into your bank account. It also uses two factor authentication, keeping it absolutely secure. As compared to NEFT, RTGS etc, this mode of money transfer is instant and can be done 24X7X365 without any fees to use your own money. One app can be used to make payments to anyone anywhere, as long as they are using any UPI app. You don’t even need an axis bank account to be able to use the Axis bank UPI app. Besides, there’s no need to remember or fumble around for bank account numbers and IFSC codes. You can even pay merchants & even do online shopping using this app. In fact, Freecharge has partnered with Axis Bank to launch UPI enabled payment on its Android app!

So go ahead and download Axis Pay UPI app to make your life easier!


Neung Roi Review

neungroi-9

Recently I was invited by Radisson Blu plaza, Delhi, to try out Thai food at Neung Roi. I was actually supposed to try it exactly a year back when I had been invited to try out the spa experience. However the relaxing spa experience did not leave me any time for a leisurely 4-5 course lunch. So this year I went exclusively to try out the Thai food at Neung Roi. I really like Thai cuisine a lot and also make a lot of it myself. But then the stuff I make, mostly uses ready made pastes etc. So I was pretty excited to have “authentic” Thai home food prepared by Master Chef Yengai Suthiwaja.

Neung Roi means 100 in Thai and has been named after the 100oC East longitude, which runs through Thailand. Neung Roi is perhaps  the first Thai restaurant I have seen, that segregates its menu based on the major culinary regions. There are four major culinary regions listed – Isan, Lanna, South and the Central Plains. The menu has a preface that explains the specialty of each region. For example the Isan region has spicy flavours,  hot and salty dishes are from Lanna, seafood and fresh produce is from South, and mild, subtle and balanced flavours are from the Central Plains here. I like a menu that actually enlightens the consumer. It was only after a lifetime of eating Chinese or “Chindian” did I realise that Manchuria, Sichuan (misspelt as schezwan in India or even Sehejwan!), Hakka , Hunan, Shandong etc refer to various regions and hence different influences on Chinese food.

The ambience of the restaurant is very nice. Soothing tones, attractive lighting and spacious seats.

neungroi-10


So without much ado, here’s what all I tried from the iPad menu I was provided. Since I went alone for the review (instead of in a group), some of the portion sizes were customised for me and made smaller.

We started with something that was a mouth freshener sort of thing. It was made with a betel life like a paan but had typical Thai flavours like lemongrass, chili, peanuts etc.

Thai Paan


STARTERS & SALAD

Various starters and salad with small portions for me

Pla Phad Khing

Wok fried fish with black mushroom & crispy ginger. This was really tasty.

Gai Yang

Grilled chicken with coriander roots & roasted chilli sauce. The chicken tasted a bit chewy but that was because I realised that the skin was on. And although it felt and tasted like fried chicken, it had been grilled. It was flavourful.

Som Tum

Raw papaya salad with peanut, chilli & light soya sauce. The salad was light and refreshing and also used edamame beans – something I have never used myself while making this salad.

Chormuang

neungroi-1 neungroi-2

Steamed Thai butterfly flower dumpling filled with vegetable

While going through the iPad menu my eyes stopped at “butterfly flower” and I was immediately curious about what this dish was. I wondered if it was made with something called “butterfly flower” or it looked like a “butterfly flower”. So I was told by the waiter that these are lavender coloured dumplings! Can you, dear reader, imagine anything like this? That piqued my curiosity even further and I ordered this dish. I must say it was quite a surprise when it came! Not only did it look spectacular, i tasted great. Later the chef met me and told me that the dough for the dumplings uses stock from dried purple flowers which give it this colour. And the filling was sweet potato, onions and peas!

SOUPS

Tom Yum Gai

neungroi-3

Spicy & sour chicken soup with lemongrass, kaffir lime & galangal. The soup was very flavourful and the individual flavours were distinctly standing out.


MAIN COURSE

Gaeng Kiew Wan Gai

Chicken green curry with Thai eggplant, basil, kaffir lime & coconut milk. The thai curry was quite tasty. I often make red and green curries at home and the wonderful new addition here was the crunchy Thai brinjal that looks more like capers.

Gai Kraprow

neungroi-4

Minced Chicken with long beans, hot basil & chilli. This was also quite tasty but perhaps best eaten with rice.

Pla Sam Rod

neungroi-5

Crisp fried fish in three flavor sauce. It was really tasty but felt more like a stand alone appetiser rather than a main course dish to be eaten as an accompaniment to other dishes.

Phad Thai Pak

neungroi-6

Flat rice noodle with bean sprout, chive, tamarind, chilli & peanut. I make rice noodles all the time at home. Nevertheless these were really tasty and actually had different flavours from the ones I am used to. Also, I’ve never used lemon juice on top of pad thai noodles! That was an interesting take.


DESSERT

Tub Tim Krob

neungroi-13

Water chestnut in coconut jasmine syrup. The water chestnuts had been soaked in a strawberry flavoured gelatinous syrup and resembled pomegranate seeds! It was quite tasty.

Kanom Tom

neungroi-12

Jaggery stuffed pandanus glutinous rice dumpling with coconut. This was the first time I had a sweet dumpling! That too with jaggery & coconut. It felt like I was eating an Indian sweet dish. But it is important to eat them while they are hot, else the jaggery solidifies a bit.

Fig & Honey Ice cream

neungroi-11

A non Thai dessert, but very tasty nevertheless.


After a very sumptuous meal I visited the washroom at Radisson Blu plaza and was completely floored by the gigantic drawing room that I entered in, which also happened to house toilets! So here are a few images of that lavish room too 🙂

neungroi-7 neungroi-8

After this I met Master Chef Yengai Suthiwaja for some chit chat where I discussed various preparations and she also showed me the flower that gave those gorgeous dumplings their colour. It is a dried flower imported from Thailand for this very purpose.

neungroi-14

And here’s Master Chef Yengai Suthiwaja who I thanked for a hearty meal which was flavourful and also very interesting at the same time.

neungroi-15


Here are some more details of Neung Roi. Reservations are recommended.

Phone number

011 33105576

Address

Radisson Blu Plaza Delhi, National Highway 8, Near IGI Airport, Mahipalpur, New Delhi

Cost

Average Rs 3,000 for two people (approx.) VAT & service charges extra


Cheesy Quinoa Quenelles with Mango Aioli

Recently I made these Cheesy Quinoa Quenelles with Mango Aioli 🙂 I have had Quinoa earlier but didn’t like it much then. But this particular dish is really really tasty and definitely in favour of quinoa. I had seen a lot of quinoa fritters recipes on the net and Aioli recipes as well .. I imbibed all these various recipes, added the king of fruits into it and thus came Cheesy Quinoa Quenelles with Mango Aioli !

They were the perfect accompaniment to the monsoon season. Crunchy, cheesy, full of texture, healthy star ingredient and that aioli was to die for! I will use it with other dishes too. Here’s the recipe:

Cheesy Quinoa Quenelles with Mango Aioli

Portion size : 2

Serves : 3-4

Cooking time : 30 minutes

Preparation time : 5 minutes

Ingredients

Mango Aioli

Half a pureed ripe mango (roughly 4 tbsp)
2 tbsp mayonnaise
2 tablespoons fresh lime juice
1 tbsp fresh lemon rind
Some chopped red paprika (or any other chilly)
1 tablespoon minced garlic
1/2 teaspoon salt

Quinoa Quenelles

2/3 cup quinoa, rinsed, drained (I used the red quinoa)
1/4 cup flour (maida)
1/4 cup crumbled or grated Mozzarella (or any other cheese)
3/4 teaspoons salt
Freshly ground black pepper
1 chopped onion
1/4 cup coriander or mint (or whichever leafy herb u prefer)
1 large egg
Vegetable oil (for frying)

Method:

Mango Aioli

Blend mango puree, garlic, paprika, salt, lime juice and lemon rind in a mixer. Whisk in mayonnaise. Adjust salt/chilly if required. Cover and chill. (You can make this a day in advance also)

Quinoa-7Quinoa-9Quinoa-2

Cheesy Quinoa Quenelles

1. Heat a pan. Add quinoa, toast it, stirring constantly for about 5 minutes. (White quinoa will become golden)

Quinoa-6
2. Add 1 1/3 cups water to quinoa and boil it. After boiling, let it simmer on low heat till it is cooked and till quinoa has absorbed all the water. (~12 minutes)

Quinoa-10
3. Remove from heat and keep covered for 15 minutes. Uncover and cool. Transfer to a large bowl (in which you will make quinoa dough).
4. Add flour, onions, coriander or mint, salt & pepper to quinoa and toss. Add cheese, mix well. Beat the egg separately and stir into this mix until a dough forms (mix gently to prevent quinoa from breaking so that it retains texture)

Quinoa-15
5. Heat oil in a pan.
6. Take 2 large table spoons. Scoop dough in one spoon, use the second spoon to scoop this dough out of first spoon, repeat process till a smooth oval shape (like a rugby ball) has formed. (Congratulations you just made a quenelle!)
7. Fry these quenelles in oil, turn occasionally and transfer to a plate with a napkin or paper towel.

Quinoa-3Quinoa-4

8. Serve the cheesy Quinoa Quenelles warm with the Sweet & spicy Mango aioli .. Enjoy along with the monsoons

Quinoa-1 


Here’s the recipe in recipe card format as well

Cheesy Quinoa Quenelles with Mango Aioli
Write a review
Print
Ingredients
  1. Mango Aioli
  2. Half a pureed ripe mango (roughly 4 tbsp)
  3. 2 tbsp mayonnaise
  4. 2 tablespoons fresh lime juice
  5. 1 tbsp fresh lemon rind
  6. Some chopped red paprika (or any other chilly)
  7. 1 tablespoon minced garlic
  8. 1/2 teaspoon salt
  9. Quinoa Quenelles
  10. 2/3 cup quinoa, rinsed, drained (I used the red quinoa)
  11. 1/4 cup flour (maida)
  12. 1/4 cup crumbled or grated Mozzarella (or any other cheese)
  13. 3/4 teaspoons salt
  14. Freshly ground black pepper
  15. 1 chopped onion
  16. 1/4 cup coriander or mint (or whichever leafy herb u prefer)
  17. 1 large egg
  18. Vegetable oil (for frying)
Method
  1. Mango Aioli
  2. Blend mango puree, garlic, paprika, salt, lime juice and lemon rind in a mixer. Whisk in mayonnaise. Adjust salt/chilly if required. Cover and chill. (You can make this a day in advance also)
  3. Cheesy Quinoa Quenelles
  4. 1. Heat a pan. Add quinoa, toast it, stirring constantly for about 5 minutes. (White quinoa will become golden)
  5. 2. Add 1 1/3 cups water to quinoa and boil it. After boiling, let it simmer on low heat till it is cooked and till quinoa has absorbed all the water. (~12 minutes)
  6. 3. Remove from heat and keep covered for 15 minutes. Uncover and cool. Transfer to a large bowl (in which you will make quinoa dough).
  7. 4. Add flour, onions, coriander or mint, salt & pepper to quinoa and toss. Add cheese, mix well. Beat the egg separately and stir into this mix until a dough forms (mix gently to prevent quinoa from breaking so that it retains texture)
  8. 5. Heat oil in a pan.
  9. 6. Take 2 large table spoons. Scoop dough in one spoon, use the second spoon to scoop this dough out of first spoon, repeat process till a smooth oval shape (like a rugby ball) has formed. (Congratulations you just made a quenelle!)
  10. 7. Fry these quenelles in oil, turn occasionally and transfer to a plate with a napkin or paper towel.
  11. 8. Serve the cheesy Quinoa Quenelles warm with the Sweet & spicy Mango aioli .. Enjoy along with the monsoons
Twilight Fairy http://blog.twilightfairy.in/


My entries for the #BringYourTastiestBowl Challenge

I know a lot of people with a sweet tooth who always keep struggling for a balance between their palate and their calorie count. And, when it comes to festivals, no one can stop at just one! Diwali, Holi, Christmas, even Navratras have become a reason to gorge at sweetmeats .. So when I read about Quaker’s #BringYourTastiestBowl challenge  I wondered if I could try my hand at not only experimenting at healthier versions of sweets served during festivals, but also may be win 50 lakhs .. 🙂 The contest is being judged by the ever popular Chef Vikas Khanna as well as people who vote for their favourite recipes.

As we know, Oats are a gluten free, rich source of fibre, which give energy to keep you going for a long time. Hence it is healthier to make Oats based versions of popular “unhealthy” dishes 🙂

So here are my versions of 2 very popular sweets – Mango Basil Oats phirni (diwali) and Oats Til laddoo (Lohri) for the “Bring your tastiest bowl challenge”

Mango Basil Oats Phirni

Phirni is a classic Indian rice pudding, similar to kheer, that is mostly consumed in north India on festive occasions like Diwali, Karwa Chauth etc. The dish is also consumed during Ramzan and prepared for the feasts at Muslim weddings and festivals like Id, among the Muslim communities of India, Bangladesh, Pakistan, and Afghanistan. 

Here I am preparing my version of Phirni with Oats instead of rice. And I have given it a further twist by adding mango and Basil flavours to it. Without further ado, here’s the recipe.

Mango Basil Oats Phirni

Portion size : 1

Serves : 3-4

Cooking time : 30 minutes

Preparation time : 5 minutes

INGREDIENTS

  • 1 litre Full cream milk
  • 1 cup oats
  • 2 Tbsp sugar or as required
  • 18-20 almonds/badam, blanched, reserve a few for garnishing
  • 6-7 cardamoms/hari elachi (crushed and powdered in a mortar-pestle)
  • 2 Mangoes for mango puree
  • Few leaves of Basil for garnishing

MeThod:

1. Grind the Oats in a dry grinder till it is fully powdered. Keep aside 

      quaker-1 quaker-4

2. Heat milk in a thick bottomed broad pan or sauce pan or kadai, let the milk come to a boil. Then lower the flame.

3. Add the powdered oats, stir and add sugar also.

4. On a low to medium flame cook the mixture without covering. Keep stirring at regular intevals.

5. Powder the cardamoms in a mortar-pestle. Discard the almond peels from blanched almonds.

6. When the oats are cooked and milk seems to be half the original quantity, add the almonds & cardamom powder.

7. Stir and cook for further till the phirni thickens.

8. Take out the pulp of 2 mangoes and puree in a mixer.

9. Pour the phirni in serving bowls. Pour a layer of mango puree on top and refrigerate the Phirni.

10. Once cooled, garnish the phirni with basil leaves & serve.

quaker-8 quaker-11


Gluten Free, Vegan Oats Til Laddoo

Til or sesame laddoos are typically consumed on Lohri. These laddoos typically also have khoya or condensed milk. My version of Til laddoos is made with Oats & Gud (Jaggery). There is no need to add any ghee or oil because the sesame seeds exude enough oil for binding. The absence of white sugar makes this dish even healthier. And since there are no milk products in this, not only is it Vegan, it is also Gluten free because of Oats. So here’s the recipe.

Gluten Free, Vegan Oats Til Laddoo

Portion size : 1

Serves : 10

Cooking time : 5 minutes

Preparation time : 15 minutes

INGREDIENTS

  • 1 cup oats
  • 1 cup sesame
  • 1 cup grated Gud (jaggery)
  • 3-4 cardamoms/hari elachi (crushed and powdered in a mortar-pestle)

MeThod:

  1. On medium heat dry roast oat.

quaker-2

2. Similarly dry roast sesame seeds separately until golden.

quaker-3

3. Cool them. Powder oats and sesame seeds in a mixer.


4. Add the jaggery & Cardamoms and again powder further.

quaker-5 quaker-6


5. Roll into balls while the mixture is fresh.

quaker-10quaker-7

6. Store in an air tight jar.


Do try out the recipes and let me know if they tickled your tastebuds enough. Who knows you may even stand a chance to win INR 50 lakhs by participating with a unique entry!


Dal Makhni Lentil burger with Chicken Curry Mayo


I have been following Masterchef Australia since quite a while now. So when Knorr India came up with a contest that gave a chance to meet the judges, and attend a #knorrmasterclass, I went all in! The pre-requisite was to use any new Knorr Easy chef Indian masalas in a dish. So I promptly ordered mine from Bigbasket as instructed. What I came up with is a Dal Makhni Lentil Burger (using dal makhni masala) with Chicken Curry Mayo (using chicken curry masala). I’ll go straight to the recipe.


Dal Makhni Lentil Burger with chicken curry mayo

Portion size : 1

Serves : 1

Cooking time : 30 minutes

Preparation time : 7 hours

Utensils/Equipment – 1 pressure cooker to cook the Black Urad dal, 1 pan for making the lentil patty, knife for chopping, 1 cutting board, 1 utensil to soak dal overnight, 1 pan for making the lentil mix, 1 mixer for bread crumbs

INGREDIENTS

Black Urad dal – ½ cup
Onion – 1, finely chopped
Knorr Dal Makhni masala
Knorr Chicken curry masala
Butter – roughly 2 tbsp & some for frying
Mayonnaise – 4 tbsp
Salt – to taste
Bread – 1 slice
Jalapenos, Red paprika, pickled Gherkins, iceberg lettuce, tomato – for garnish

MeThod:

1. Soak Black Urad dal overnight. Next morning pressure cook it till the grains are soft (roughly half hour for patty, 1 hr if you want actual dal)

2. In a pan fry some onions in butter. If you use the masala you dont need to add anything else, but I added a little onion for texture in the patty.

DalMakhniLentilBurger-1 3. Add the dal, half packet of Knorr Dal Makhni masala & just 2 spoons of water to mix it all well. Sprinkle some salt, but this masala already has salt, so be careful about how much you add. Let it cool and mash it completely.

DalMakhniLentilBurger-2

4. Pulse one slice of bread in a mixer and add these bread crumbs to the lentil mash for increasing binding.

5. After the mix is mashed, shape into patties and fry in some butter for added makhni flavour.

DalMakhniLentilBurger-3

6. Now prepare chicken curry mayo, by taking the mayonnaise in a bowl and adding a few pinches of the chicken curry masala. Mix very well so that the masala is completely absorbed well into the mayonnaise & u dont taste it as separate granules.

7. Heat the burger bun. Take the lower part, spread some of the chicken curry mayo, place some iceberg lettuce on to it and a dal makhni patty.

DalMakhniLentilBurger-4

8. Garnish with red paprika, chopped jalapenos, slivers of pickled gherkin & slices of tomato. You can add more mayo if desired. Voila! Enjoy!

DalMakhniLentilBurger-13

Here’s a composite image of all the elements of this dish.

DalMakhniLentilBurgerWithElements

I must say it was quite tasty ESPECIALLY the chicken curry mayo. Dal makhni flavours anyway go so well with butter chicken & chicken curry. So go ahead try this protein packed very filling Dal Makhni Lentil Burger with Chicken Curry mayo and let me know how it turned out!